
Branch’s webhook system allows you to export install and down-funnel event data as it occurs. You can import this data into your internal systems for analysis. You simply need to specify a URL for the POST or GET requests.
Support References:
Log in to Branch
- Log in to your Branch account at dashboard.branch.io/login.
Webhook Setup
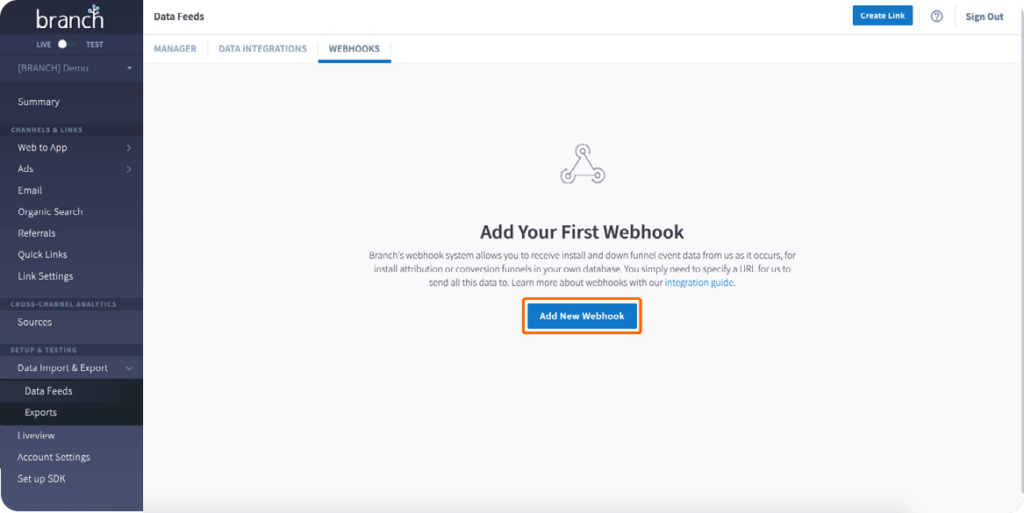
- Navigate to your app in the dashboard.
- Go to Data Feeds > Webhooks.
- Click Add New Webhook.
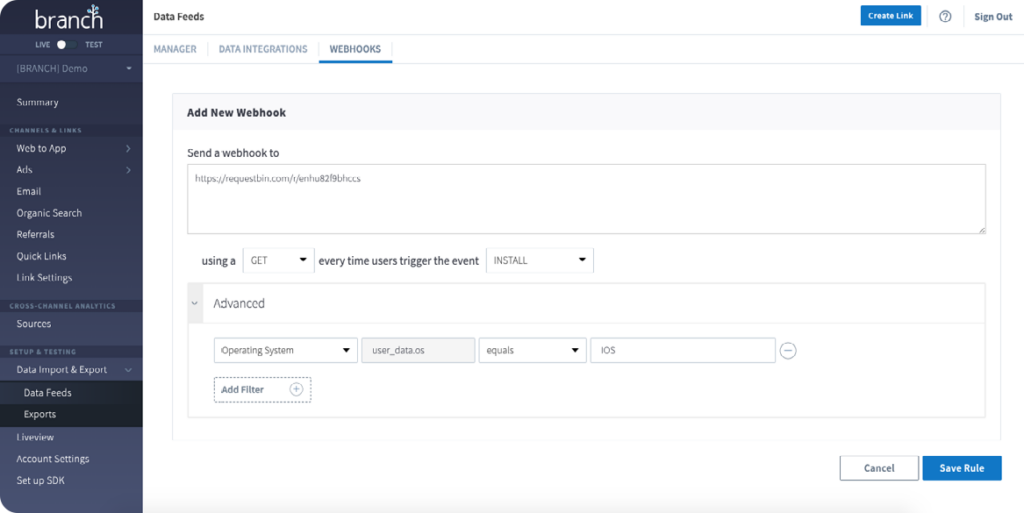
- Place
https://adsmeasurement.com/v1/attributionas the destination URL. - Select Post.
Configure the JSON Payload
- Define your custom POST body using static and macro parameters.
- Macros like
${ip},${user_agent},${timestamp}will be replaced automatically by Branch.
- Macros like
{
  "product": "xyz", // Static
  "eventName": "purchase", // Static
  "device_id": "${idfa_or_aaid}", // Dynamic
  "ip_address": "${ip}", // Dynamic
  "useragent": "${user_agent}", // Dynamic
  "timestamp": "${timestamp}" // Dynamic
}
Set Authentication Header
- Below the payload section, there is a Headers section in the webhook configuration. Add your header like this:
- Key:
Authentication-Key - Value:
YOUR_API_KEY
- Key:
Select Events to Trigger the Webhook
- Choose specific events this webhook should trigger on (e.g., install, open, purchase, etc.).
- Event Mapping: Create a separate webhook trigger mapped to each of your partner’s supported event names. Please reach out to your Atlas Publisher for their supported event names.
Save and Test
- Click Save Feed.
- Trigger a test event via your app or emulator.
- Confirm delivery in Branch’s Event Tester or by monitoring logs at your endpoint.
Additional Information
Email atlassupport@kochava.com for support or reference Branch’s Webhooks documentation for more information on Branch’s Webhooks.